Saturday, 5 April 2014

Items from the March 2014 Pamper Event


Below are the items that were on offer to purchase at the Pamper Event on March 28th, 2014. 
Please send me a message below for current availability and prices.


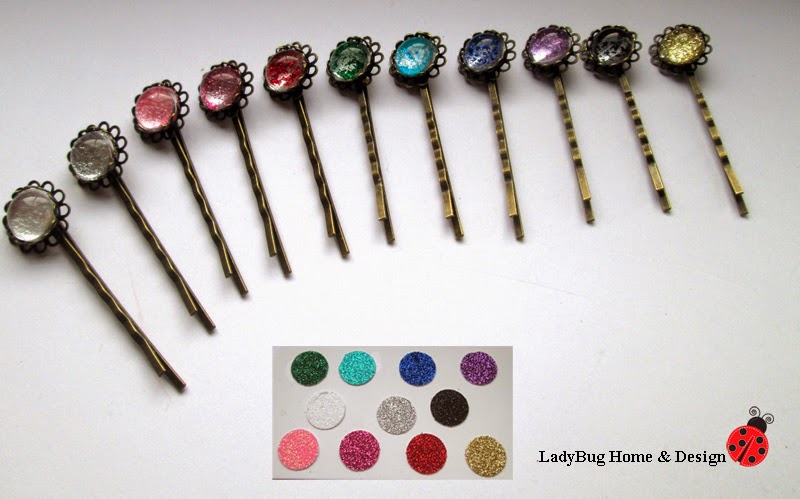
(The below earrings can also be created with the above glitter. Also, have bronze clip-on earrings and french earrings.)

You can either have one on 1.75in/45mm alligator clip OR 50mm (60mm top) french barrette.


3/8 inch ribbon bow sets on 1.75in/45mm alligator clips with non-slip grip.  


Custom bow sets can be made from one of the ribbons shown below.  (Subject to availability)
 
Headbands Options
 
  Thank you for reviewing my items for sale.  Like my LadyBug Home & Designs Facebook page for more information on inventory and promotions. 
SHARE:

LadyBug Home & Designs 1st Retail Stall

I have not posted a new blog post the last couple weeks because I was busy preparing for LadyBug Home & Designs' 1st selling event at a Pamper Night at a local First (Elementary) School in Berkhamsted.  I was invited to have a stall by the talented Natasha from Nevie-Pie Cakes. The event was on Thursday, March 28th.

This was a great opportunity to start creating all the hair accessories and earrings that I have been designing in my head for ages.  The last 7 months, I have purchased many fun craft items to start creating items for MadeByLadybugHome shop. 

The Preparation:

I had many late nights using the hot gun to create some fun new bows and hair accessories.  I also spent time organising my ribbon and button collection.  My first job was take all the 3/8 ribbon and cut into 3 yard lengths for selling. Most of my ribbon was purchased in 5 yard length so now I have a couple bags of ribbon "scraps" that are perfect in creating new bow designs.

I had a little helper in my preparation for the event. She got chicken pox the week before the event so I had a couple extra days at home with her.  My daughter had lots of fun playing with my buttons.  Below is my daughter sorting the buttons back in the jars.  She decided to empty 4 pre-sorted jars of buttons and mix them up for me.  Unfortunately, she did this several times during the preparation week and we are still finding buttons under the dining table.  


She was also very helpful putting together the glitter hair slides.  She would match all the pieces together and then I would do the gluing.  She enjoyed her before bedtime crafting.


The day before the event, Little LadyBug was helping me put the 3/8 ribbon in the basket for display.


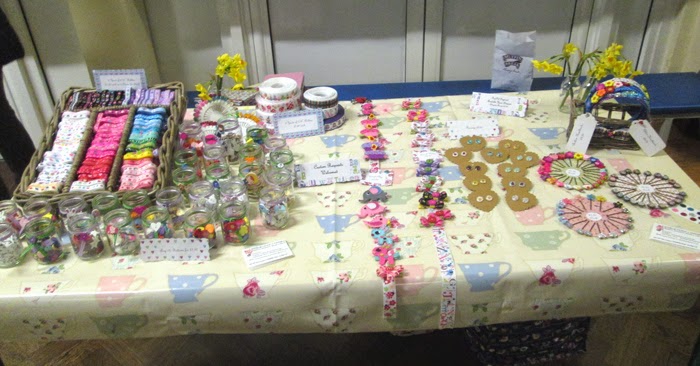
The final night before event was very busy.  My husband had to get involved in the last minute preparation. The buttons were sorted into glass jars with ribbon details and the 3/8 ribbon was sorted into basket (cutlery tray from Laura Ashley)


This the amazing book that I donated for the raffle.  I imported it from the USA because it is not being released until April 10th and I could not wait to look at all the amazing photos and ideas.  Just wish that I actually knew how to bake a cake. It will be good for future baking attempts. 


The LadyBug Home & Designs Stall

I was really nervous when I was laying out my stall.  My neighbour was the lovely Joanne from The Flint House.  We had lots of fun talking and there was an amazing curry dinner available for purchase.


I met some really nice buyers and sold some ribbon, hair slides, and hair bows.  I am no longer a "Stall Virgin" and will have more confidence for the next stall opportunity.  

A highlight of the night was finally getting to meet Marie from Heartfelt Handmade.  I have several cherished items that she made in my house. She gave me some words of wisdom before the event and after promoted several of my items on Facebook. It has a been really exciting last week as my "Likes" on Facebook Page has grown from 32 likes to 67.  I will post details photos of new items for sale on Facebook and Etsy soon.

Best Wishes,
LadyBug Home & Designs

SHARE:

Wednesday, 5 March 2014

Rainbow Fairy Magic Wand Tutorial

In honour of World Book Day on Thursday, March 6th, 2014, I made two rainbow fairy wands.

The first wand was inspired by "Isla the Ice Star Fairy" book by Daisy Meadows. Available from LadyBug Home Amazon shop.


The 2nd wand was for my little girl (aka LadyBug Rainbow Fairy).


Materials:
Glue gun (low temperature) 
Plastic or wooden stick
3/8 ribbon (any pattern for stick and rainbow colours)
Glitter card stock

Instructions:

Wand Handle
- I reused a hard plastic straw that was originally the stick for hairband lollipop probably from the dollar store in the US.  Look around your house for a stick option or wooden cake lollipop sticks. 
1.  Starting at one end and start hot gluing (low temperature setting works fine) a piece of 3/8 inch ribbon around the stick starting at the top and working your way down diagonally.
2.  Put a line of glue on about a inch of the ribbon and wrap the ribbon diagonally around the stick by tightly holding the section of ribbon past the hot glue section. Don't worry if glue squeezing out between the ribbon seams.  Just wait a few seconds until the glue cools and then pick the excess glue off.  It is better to have extra glue than too little and the ribbon unattached.
3.  When you get to the bottom of the stick trim the ribbon so you just a small piece.  You can heat seal the ribbon to prevent fraying or my suggestion is to put some glue on this end piece and gently press down. Then pick off the extra glue.   


Glitter Star
1. Find a star template.  I used one of the daughter play dough cooking cutters.  
2. Trace the star shape onto the back of the glitter card stock close to a corner.
3. Fold the card stock in half so that you can cut two stars a the same time. 
4. I would mark a "x" on one of the points on the back of both stars so it is easier to match up.  (I did not do this and glued the star incorrectly on the LadyBug wand.  It required a little extra trimming when glued so the back sides was not seen.)


Ribbon Rainbow
1.Cut equal length pieces of 3/8 ribbon to create the rainbow (You could also use 1 or 2 pieces of 7/8 rainbow ribbon.)
2. Gthered all the ribbon together and cut a diagonal cut on the bottom the all the ribbon at the same time.
3. Put a dot glue on front side of the first piece of unfinished ribbon end and lined up the second ribbon piece on top.  Continue until the last piece is glued down. 


Almost Done
Time to glue all the pieces together.  Don't be afraid to use tons of glue at this time.
1. Glue the wand and ribbon to the backside of the back star.
2. Now cover the end of the wand, ribbon and inside of the back star with tons of glue.
3. Align up the front star and squeeze the stars together.  I found that I needed to put more glue inside the opening near the ribbon and wand.
4. Take scissors and trim the stars so you don't see any of the backing of the matching stars.
5. If you happy that the rainbow ribbon tails are even than seal the ends.  (Can use a flame or clear nail polish)

My LadyBug Rainbow Fairy enjoying her wand. (Even took a nap with it on Monday) A couple of her friends got to use it too.


Here is the 7/8 ribbon that I originaly thought I was going to use.  Please visit the Etsy - LadyBug Home & Design shop for this ribbon and other options.


Warning:  I used the "high temperate setting on my glue when I started making the Ice Fairy wand and badly burned my thumb.  Read this advice about using a glue gun.  If you do get burned, cold water immediately.  Let the glue completely cool and then it has been suggested to use olive oil to gently remove the harden glue.  Removing to much skin will cause infection to get into the wound.  Good luck!
Mummascribbles
SHARE:

Saturday, 1 March 2014

German Glitter Easter Egg

Due to my recent obsession with german glitter, I wanted to find an project that I could complete in the next month and use some german glitter.  The below Easter egg was created by Karen from The Graphic Fairy.  


For the tutorial of how to create this amazing egg, please click HERE 

There are some eggs available from Ebay.co.uk but below is an option from Pipii. I love the insides with white with green flowers. 


While I try to figure out what german glitter I would like to purchase and import from the US, I think I may purchase these eggs for a more toddler friendly project. An tutorial example for this project can be found at Fancy House Blog.   I will probably cover each side of the eggs with tissue paper and then use 3/8 inch ribbon on the edges and as a loop for hanging.   


Some of my Easter ribbon has arrived and some more will be soon. Please follow LadyBug Home & Designs on Facebook for exclusive offers to purchase Easter ribbon. 


Mummascribbles
SHARE:

Monday, 17 February 2014

LadyBug Home Business Cards


These are my first business cards/marketing for LadyBug Home & Designs.  I picked my favourite buttons and just sewed them on. Wish me luck!  I also did my first Etsy coupon offer to the ladies of First Mummies Club.


ETSY Shops
Made by LadyBug Home
LadyBug Home and Designs (Supplies)


SHARE:
© LadyBug Home and Designs. All rights reserved.
Blogger Templates by pipdig